Workflows explain common uses of Warpwire. If you have an idea for another or a way Warpwire can be improved, please let us know.
Many instructors use Microsoft PowerPoint presentations as part of their online teaching. Warpwire does not support PowerPoint files, but there are ways to record your presentation, along with your audio, as a video file that can be uploaded to Warpwire. Below are instructions on how to do this in macOS as well as Windows 10 - with software that comes already loaded on your machine.
MacOS comes with the Quicktime application, which allows users to record their screen and record microphone audio simultaneously.
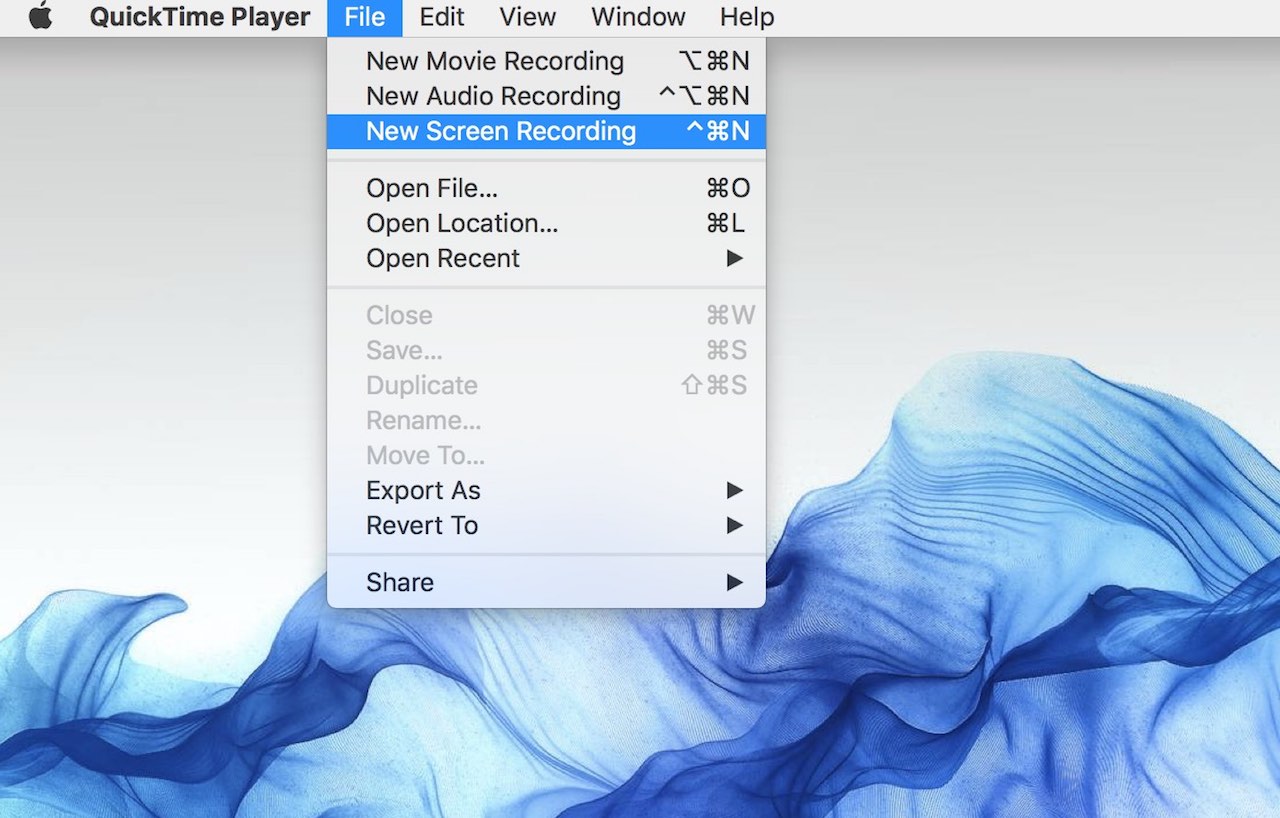
To record the screen of your computer, open Quicktime, then choose File > New Screen Recording from the menu bar.
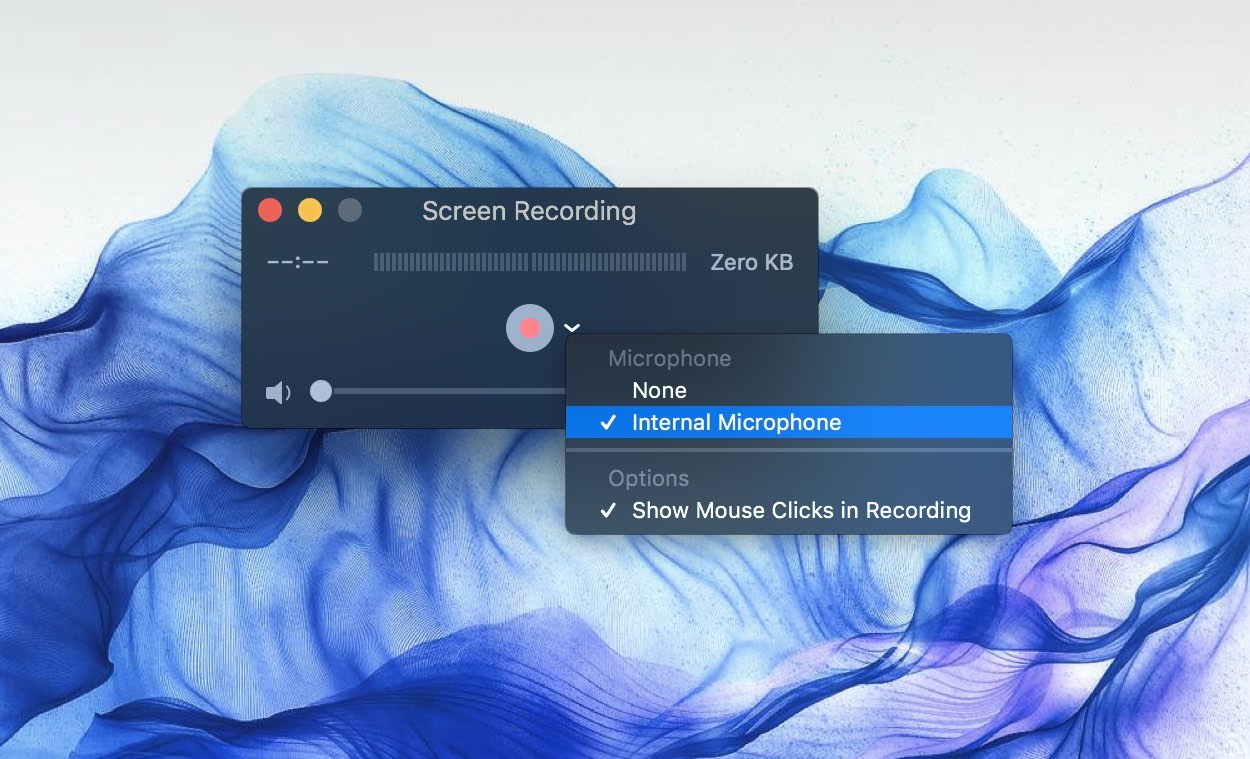
Click the arrow next to the Record button to change settings. If you want to record a voiceover or other audio, make sure your microphone is selected.
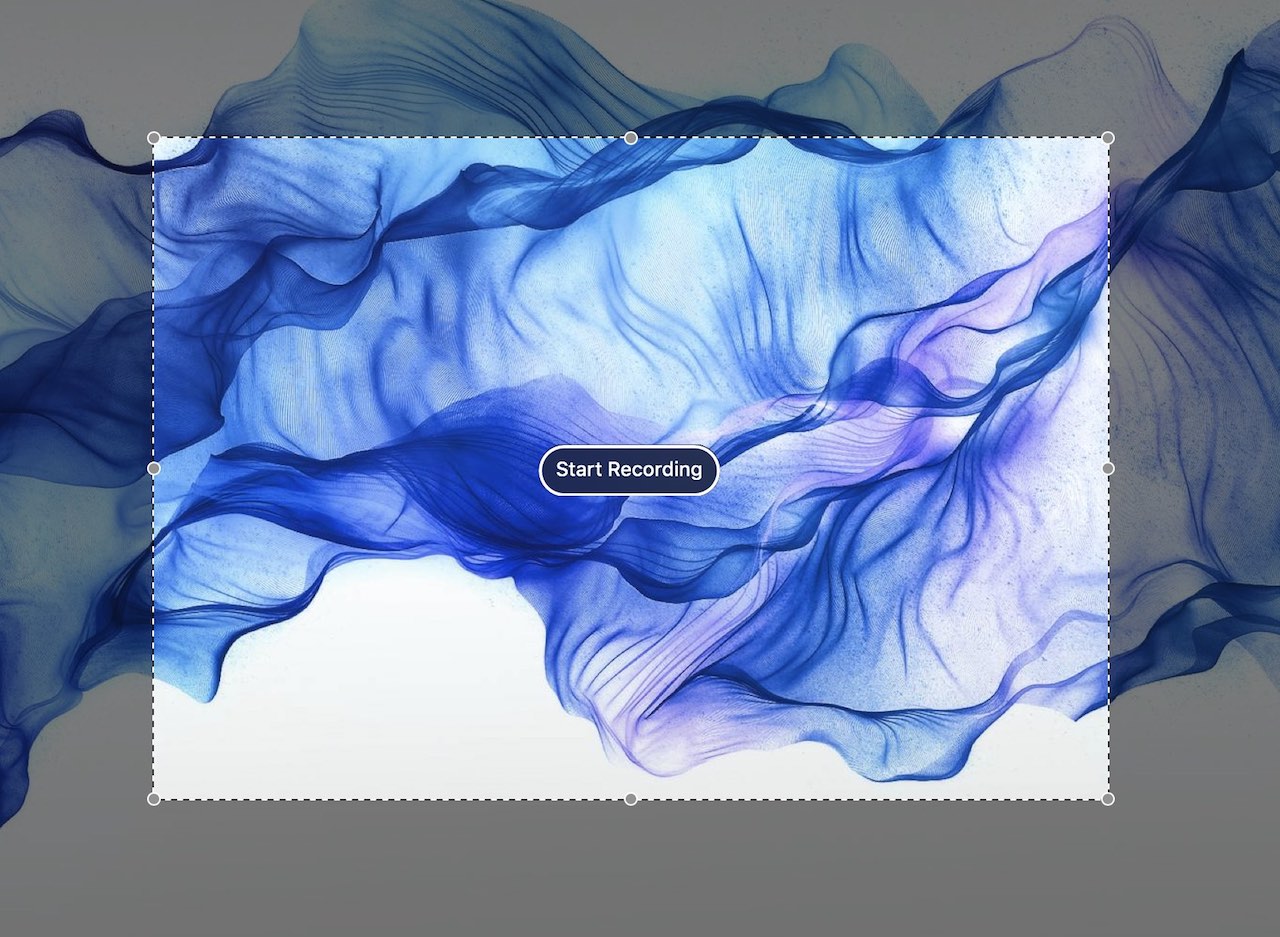
Click the round Record button to begin, then click anywhere on screen and Quicktime will start recording your whole screen.

Alternatively, you can use your mouse to drag and select an area to record, then click the “Start Recording” button in the selected area.
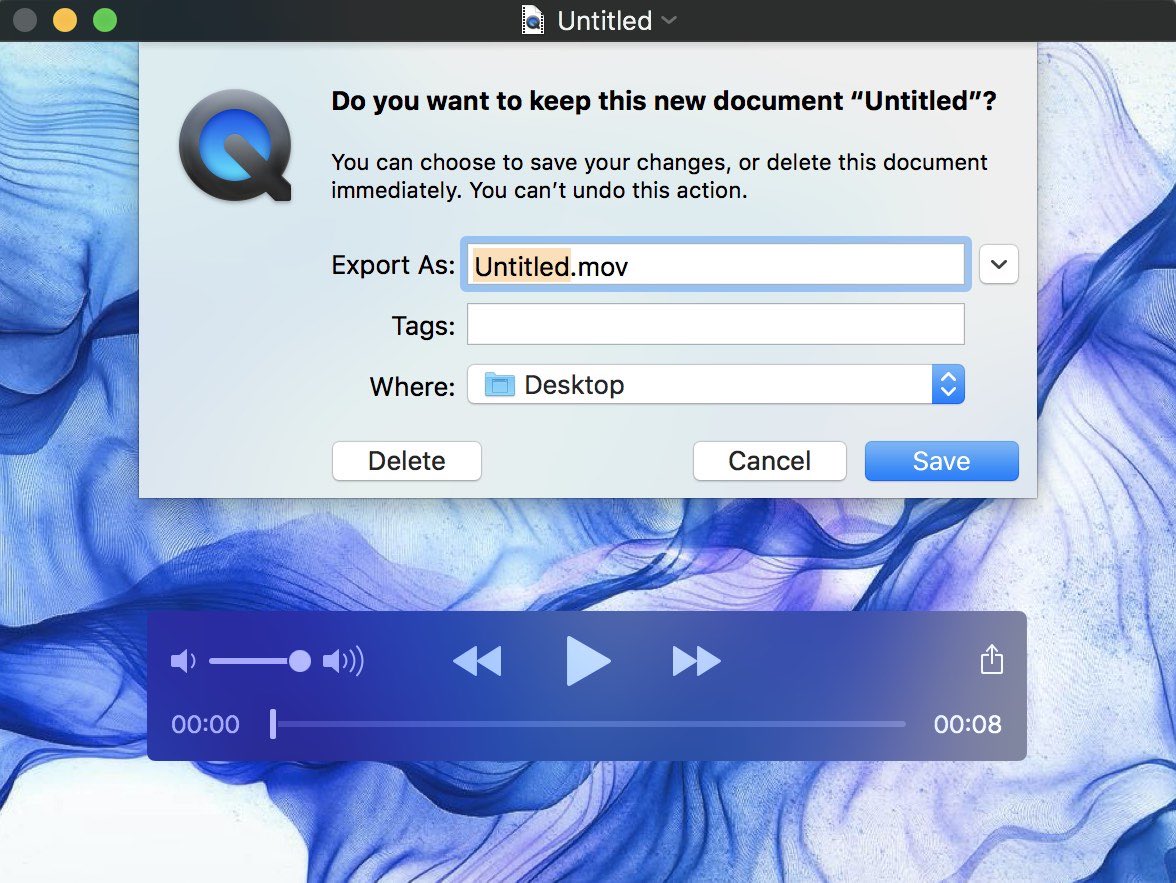
To end your recording, click the Stop button in the menu bar.

After saving your recording, you can then upload the video file directly to Warpwire, using the standard method.
Windows 10 comes with an Xbox app. One of the features of this app is the ability to record your gaming activity. However, you can use this functionality to record your screen even if you are not playing a video game.
First, open the app or screen you wish to record.

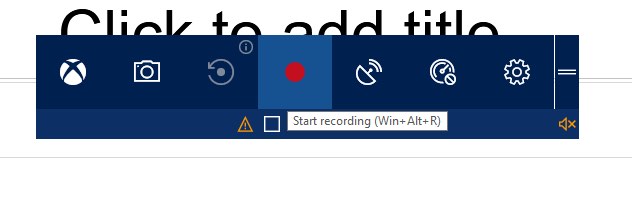
Press Win + G to open the Game Bar (this is part of the Xbox app that lets you record your screen activity). The first time you do this, you'll see the following message: "Do you want to open Game bar" and a checkbox: "Yes, this is a game." Even though you are not in fact playing a game, check the box and continue.
The Game Bar will pop up. You’ll see with controls to start and stop the recording. Click "Record mic” to record yourself speaking at the same time as you record your screen.

Press the red record button to begin screen capture.
Now, start your on screen activity.
When you are finished, stop the recording by pressing the square box in the center of the floating bar.
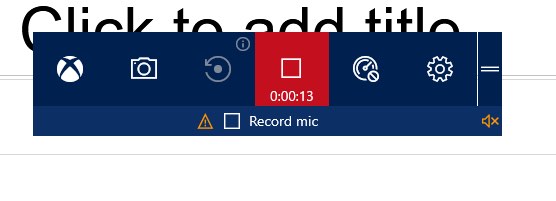
A message will appear: "Game clip recorded."
To access the recorded video, navigate to Videos > Captures within your user account. In this folder, you'll see any clips made with these method saved as MP4 files.
You can upload these MP4s to Warpwire using the standard method.