Warpwire allows Media Library admins to easily toggle the default visibility of assets added to any Media Library they administer or own.
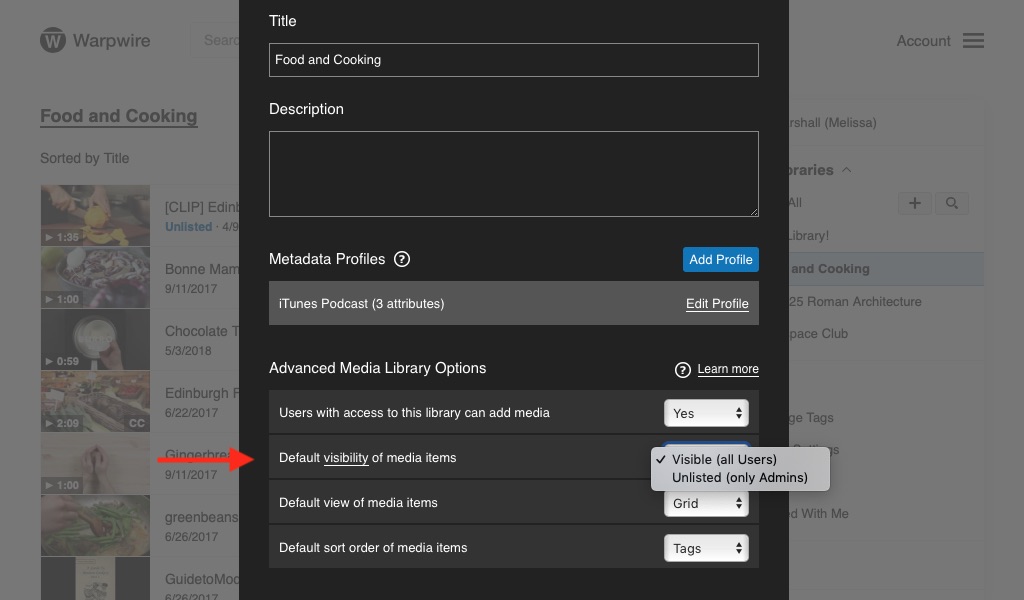
Navigate to Media Library settings to change this default. From the Settings window, you'll see a drop-down menu labeled "Default Visibility of media items."
Select "Visible (all Users)" if you want all library content to be visible to anyone with access.
Select "Unlisted (only Admins)" if you want content to be hidden until you, or another Media Library admin, explicitly make an asset visible (instructions below). Users with Media Library view access will still be able to see any content they've uploaded themselves, or content embedded in LMS pages or external websites.
Note: If you toggle between Visible/Unlisted at the Media Library level, the new setting will only impact uploads from that point foward.
Warpwire allows media asset owners/admins to easily toggle the visibility of any asset. This can be helpful if you want to upload and organize content, but don't want non-admin users with Media Library access to see a given asset.
If an asset's visibility is set to "Visible (all Users)," all users with access to the Media Library will see the asset in that library.
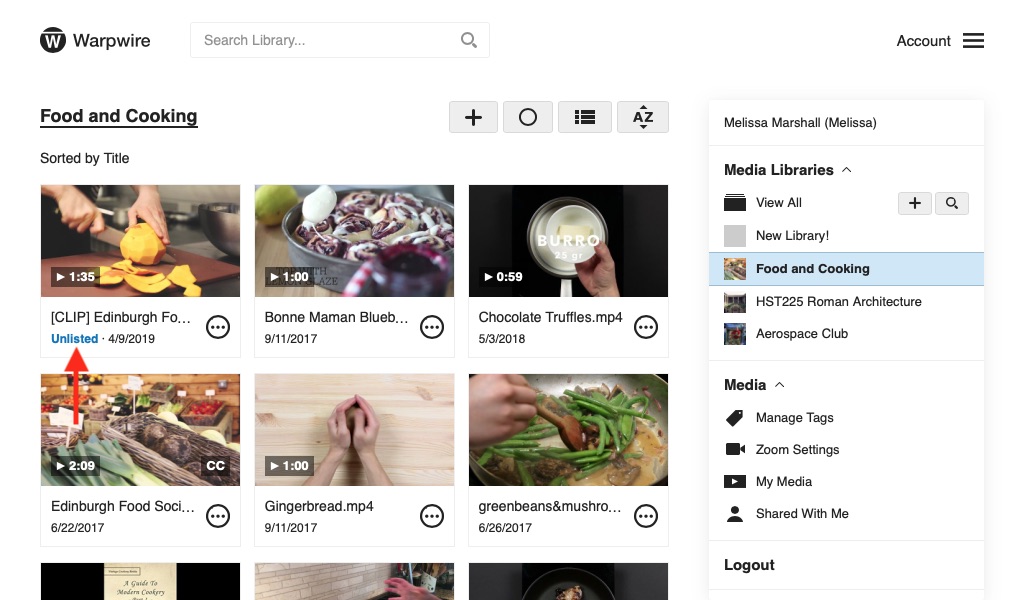
If an asset's visibility is set to "Unlisted (only Admins)", only admins will see the asset when looking at the Media Library view. Non-admin users will not see the asset in the Media Library list. Admins will see the word "Unlisted" next to the asset title, in blue, when looking at the Media Library.
The only way non-admin users can access the "Unlisted" asset is if they receive the share link directly, or if the unlisted asset has been embedded (either in the LMS or an external website).
Admins can toggle visibility from "Unlisted (only Admins)" to "Visibile (All Users)," or back again, whenever they'd like.
To change the visibility of an asset, navigate to the Settings window for that asset.
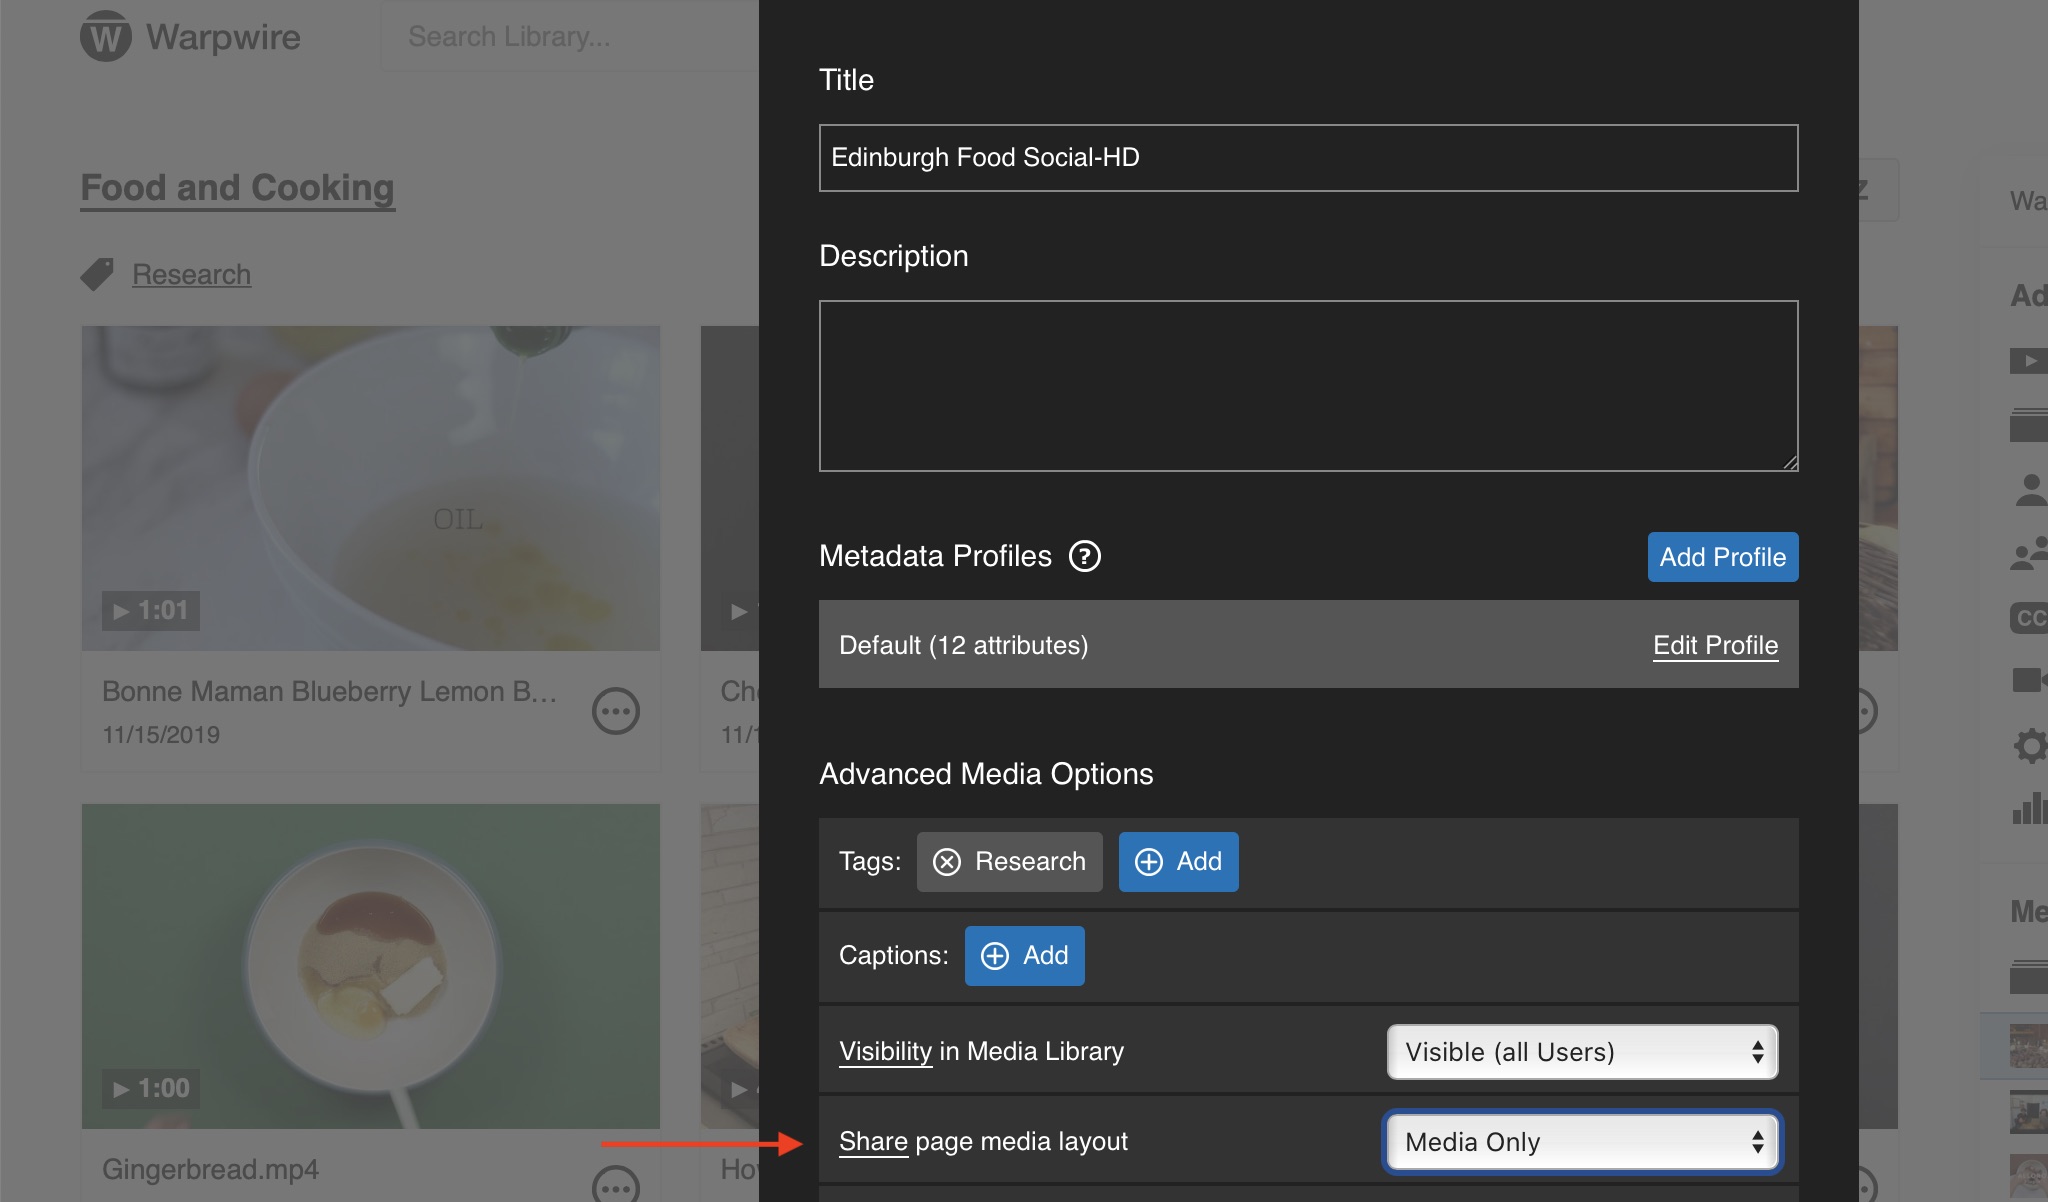
Then, select "Unlisted (only Admins)" or "Visible (all Users)" from the Visibility in Media Library drop-down menu.

When you go back to the Media Library view, you'll see "Unlisted" beneath the title of all assets that are unlisted.
Note: Unlisted assets are only visible to admins in the Media Library view. However, unlisted videos can be embedded (or accessed via the share link) where they will be visible to all users with access to the Media Library.
Within "Media Asset Option" settings, admins also have the ability to share only the media. This setting can be applied to both the Single Page View and Media Library View.
Note: If you do not change the setting at the Media Asset Level, the default setting will be the same as the setting at the Media Library Level. To override the Media Library setting for a single asset, simply change the setting at the Media Asset Level.
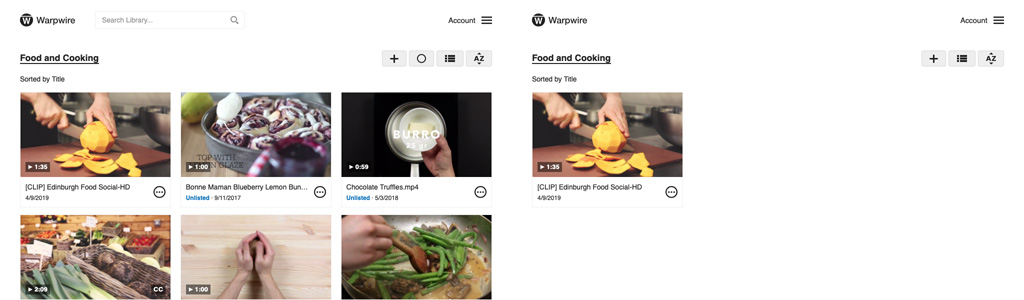
Below, compare what an admin sees when assets are unlisted (left) to what a student sees (right). Students cannot see unlisted videos, while admins will see them, along with the "Unlisted" label.
See also: Introduction, Ways to Share and Edit Media Library Settings.