Embed Warpwire Content using Blackboard Mashup
Warpwire provides integrated plugins to view and manage media within your LMS. Our seamless LTI integration means that all of Warpwire is accessible from within Blackboard. There are no accounts to create. Warpwire integrates with your institution's Single Sign-On system — giving every account access to Warpwire to securely view and manage video according to defined role and group permissions.
Best of all, every feature of Warpwire is easily accessible from within Blackboard: capture video, upload, organize, tag, and share. We’ve built Warpwire to function the same way no matter your point of access.
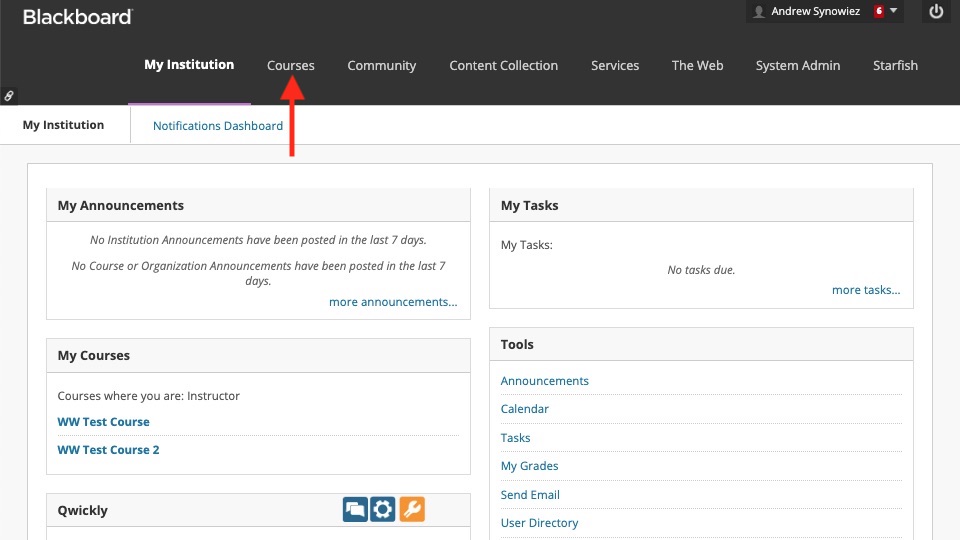
Begin by logging into Blackboard and navigating to your course page.
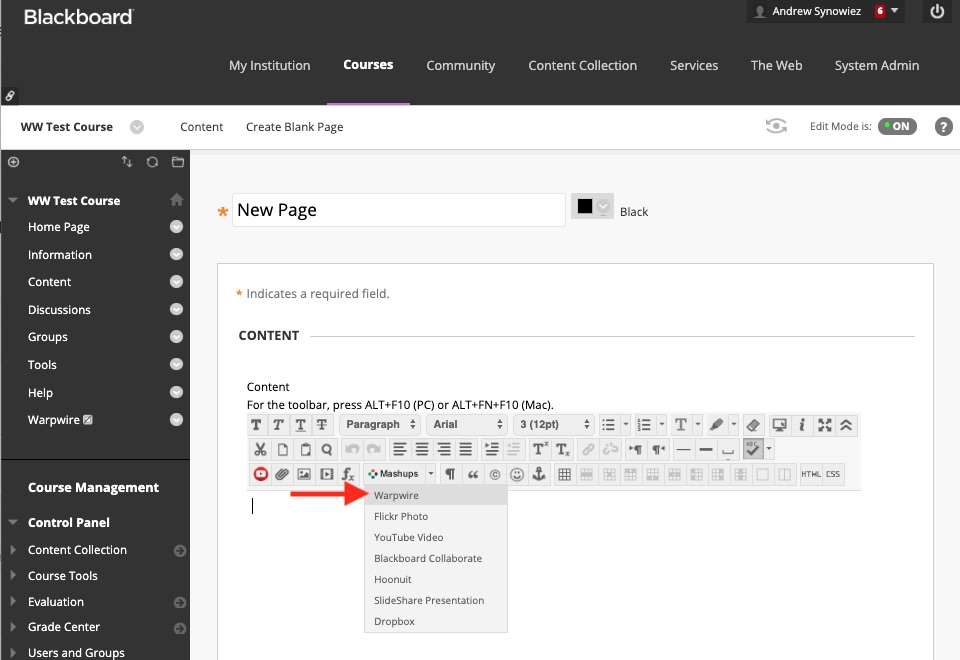
You can access Warpwire from any rich text editor inside of Blackboard.
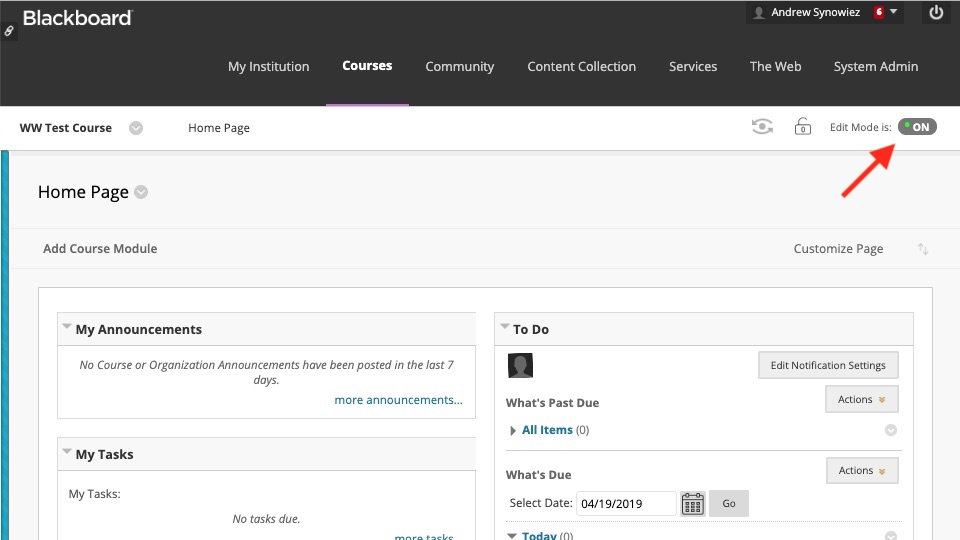
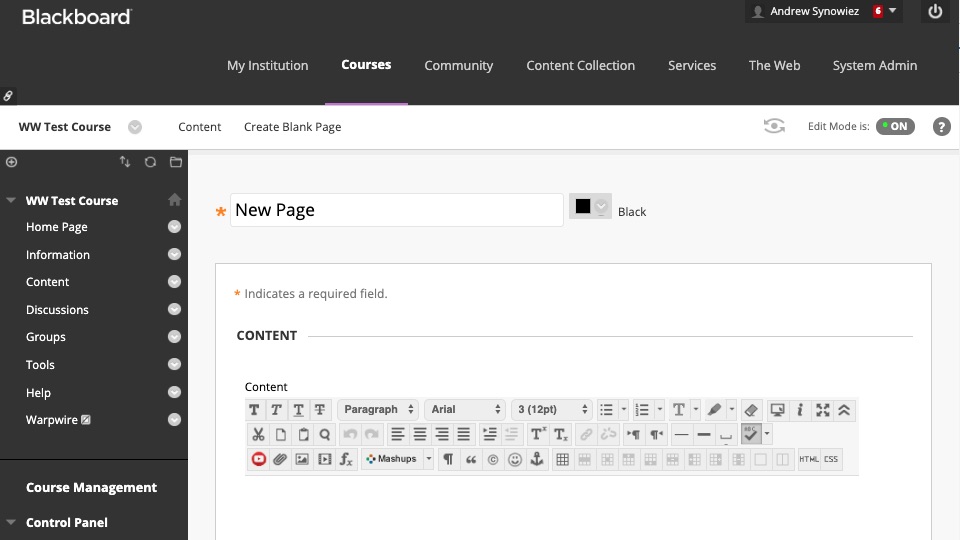
Let's create a blank page as an example.
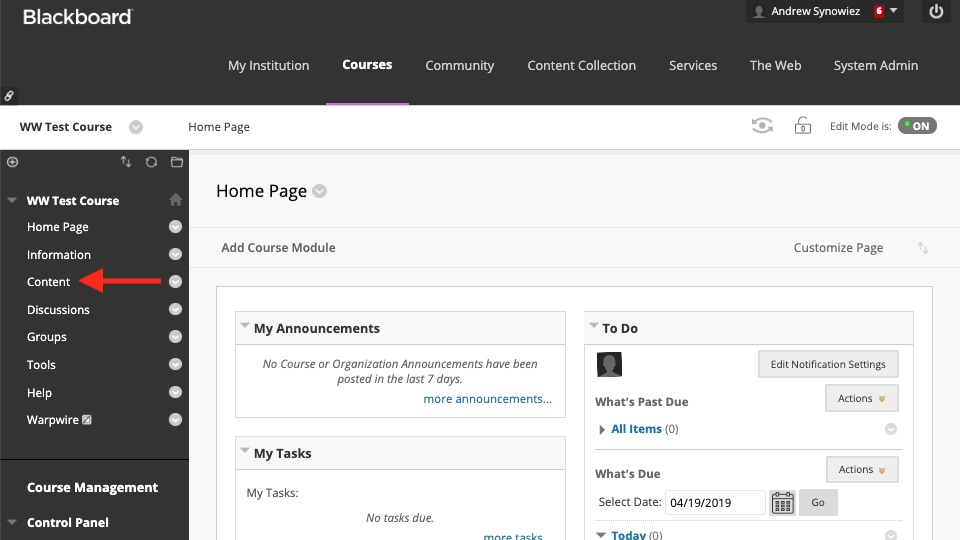
Once you've turned on edit mode via the toggle button in the upper-right, click "Content" in the left-side navigation.
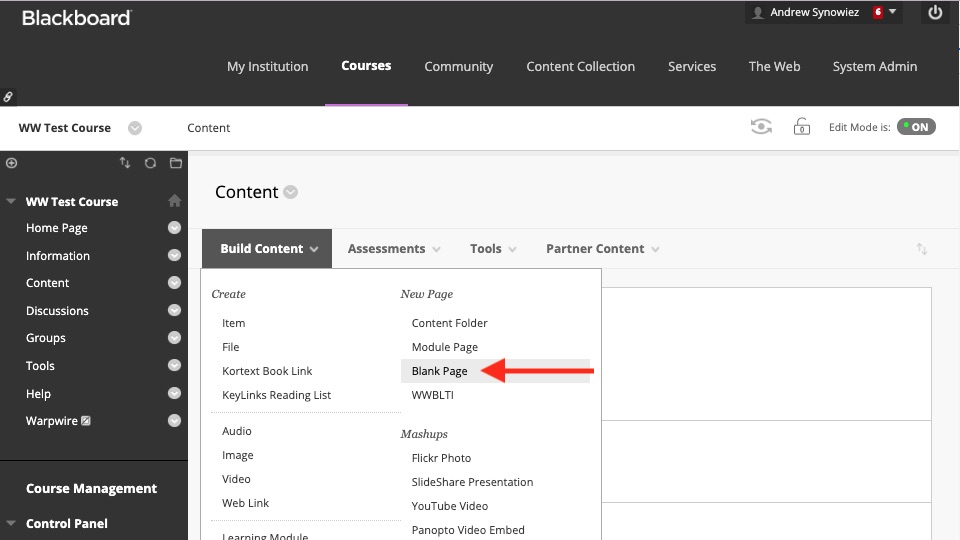
From the Content page, select "Blank Page" from the Build Content dropdown menu.
Now you'll be able to create you page. You'll give the page a name and then add whatever you like to the content section.
To add Warpwire content, click the "Mashups" button in the rich text editor and select "Warpwire Media" from the dropdown menu.
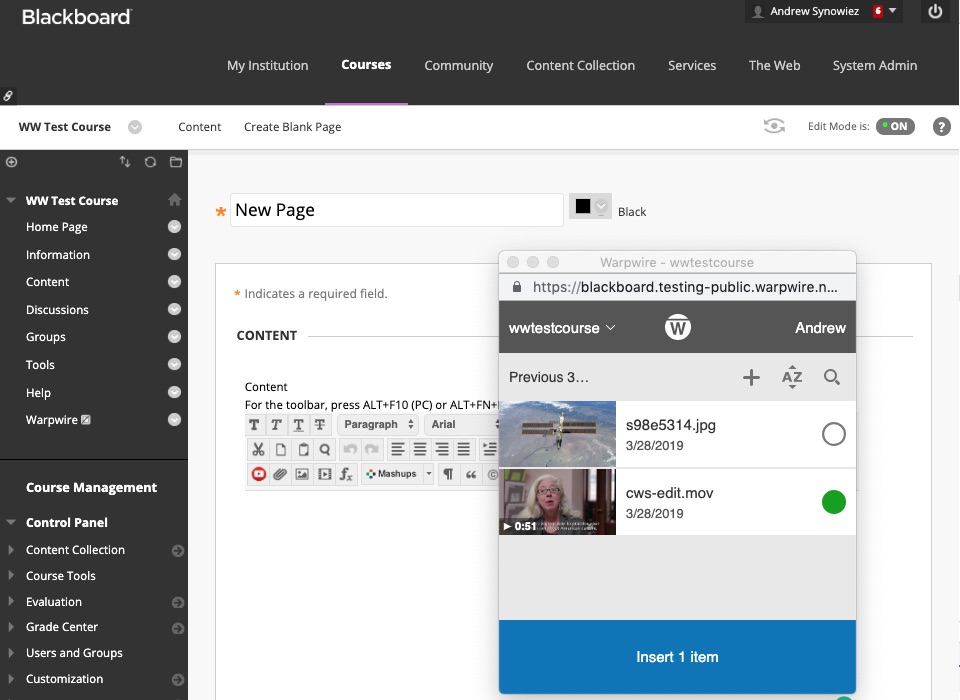
The Warpwire applicaiton will appear as a popup. You'll see any files you've already uploaded to the course Media Library, and will be able to upload, capture, and insert content into your new blank page.
Insert a Video
To insert content that's already in the Media Library, just select the video, audio file or image you want to insert and click "Insert 1 Item."
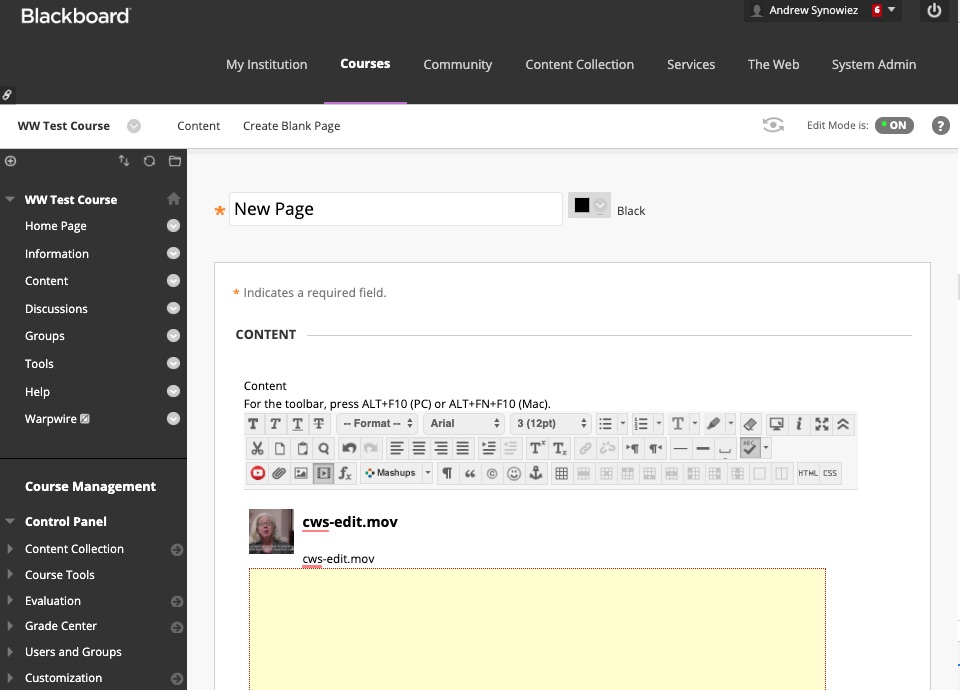
You'll see a placeholder thumbnail appear in the text editor. You can type around the thumbnail to craft a full post.
When you're done, click "Submit" and then turn off edit mode.
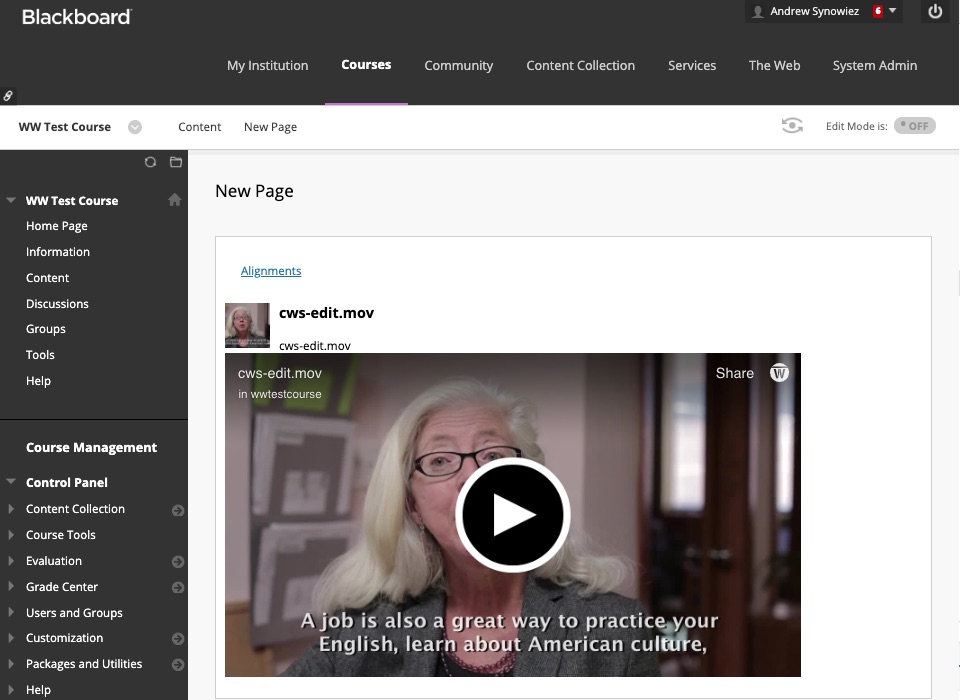
You can see your embedded content on the page, below:
Upload a Video
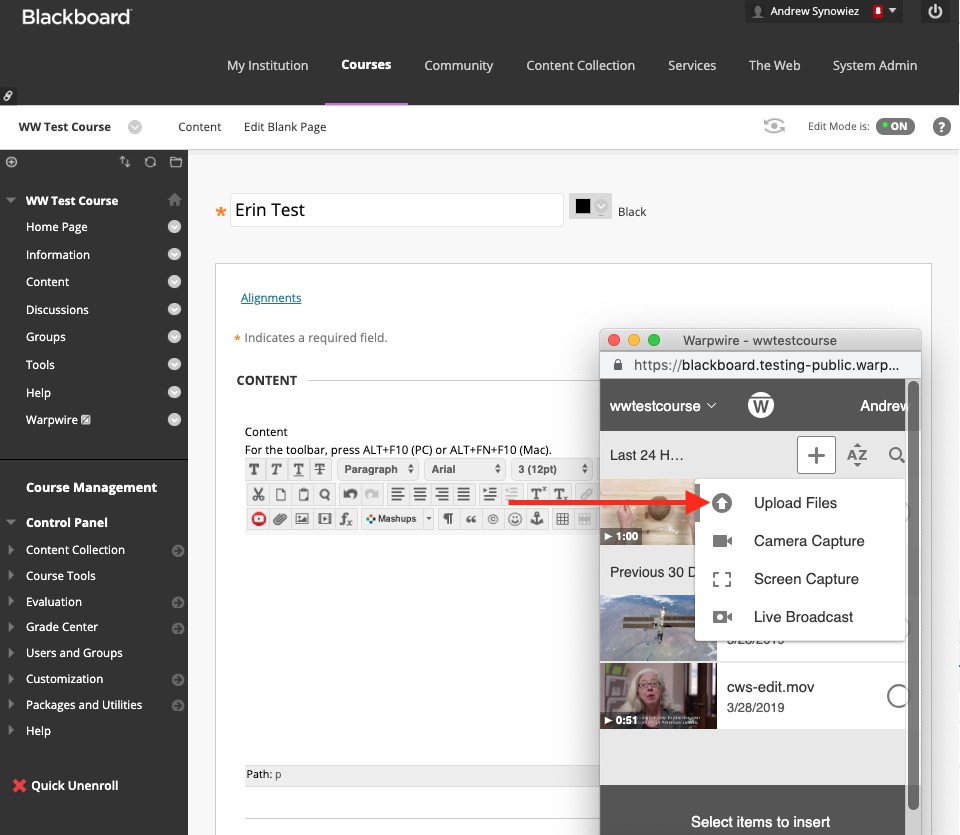
To upload a video that's not yet in your Media Library, select "Warpwire Media" from the "Mashups" dropdown menu in the rich text editor.
Then, click the plus icon in the upper-right of the resulting popup window, and select "Upload Files."
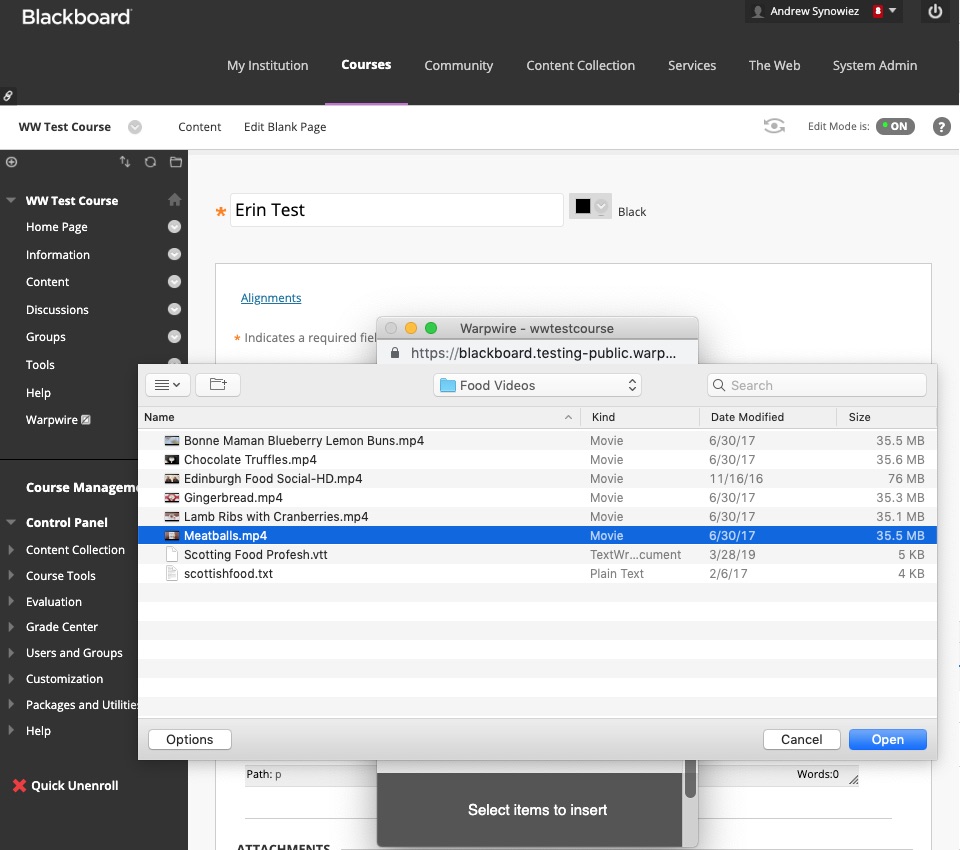
You'll now be able to use the file browser on your personal computer to navigate to the file(s) you'd like to upload. Find the file, select it, then click "Open."
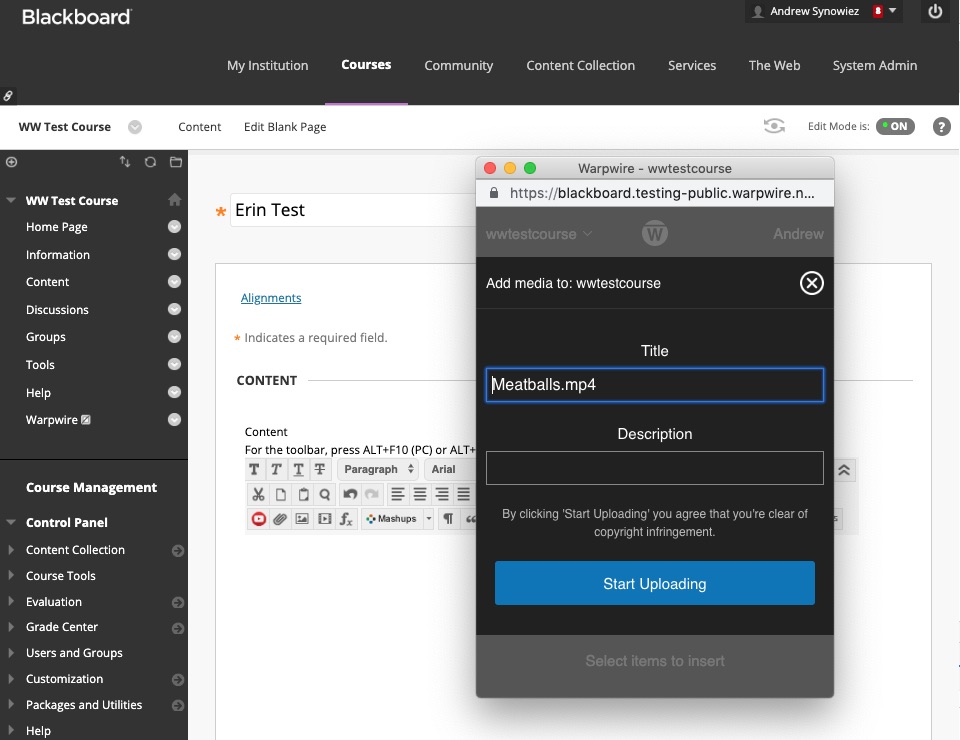
You'll now have a chance to edit the file's Title, and add a Description. When you're finished, click "Start Uploading."
An upload progress bar will be visible as your file uploads. Once the file has uploaded and processed, it will appear in the list of media files in your course Media Library.
You can insert your uploaded files using the instructions above.
Capture a Video
To capture a video, either your screen or from your webcam, and save it to your Media Library, select "Warpwire Media" from the "Mashups" dropdown menu in the rich text editor.
Then, click the plus icon in the upper-right of the resulting popup window, and select the recording you'd like to make — "Camera Capture" to record from your webcam, or "Screen Capture" to record your screen.
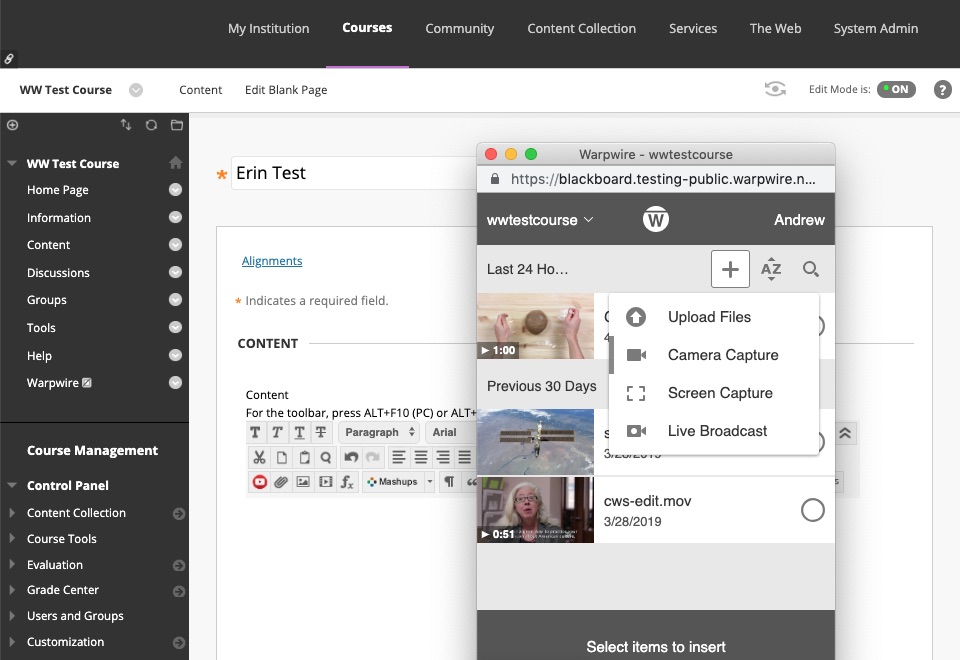
We'll use Camera Capture for this example.
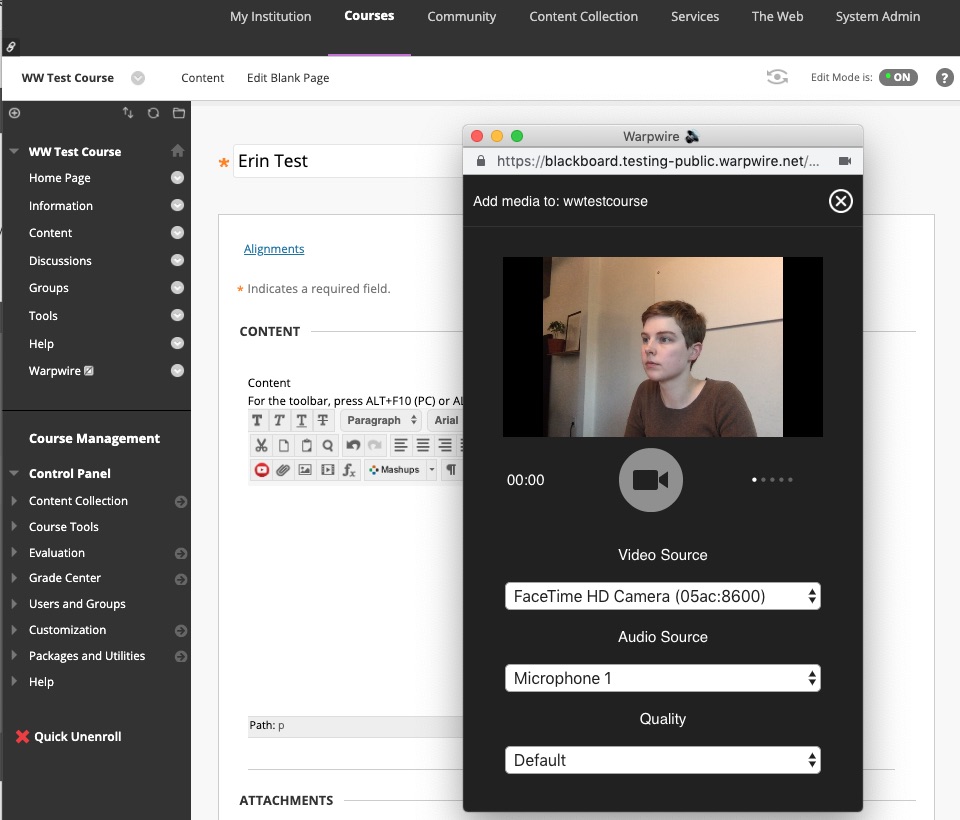
Select the desired camera and microphone, and allow your browser to use them, if you haven't already. Then click the round video camera button to begin recording.
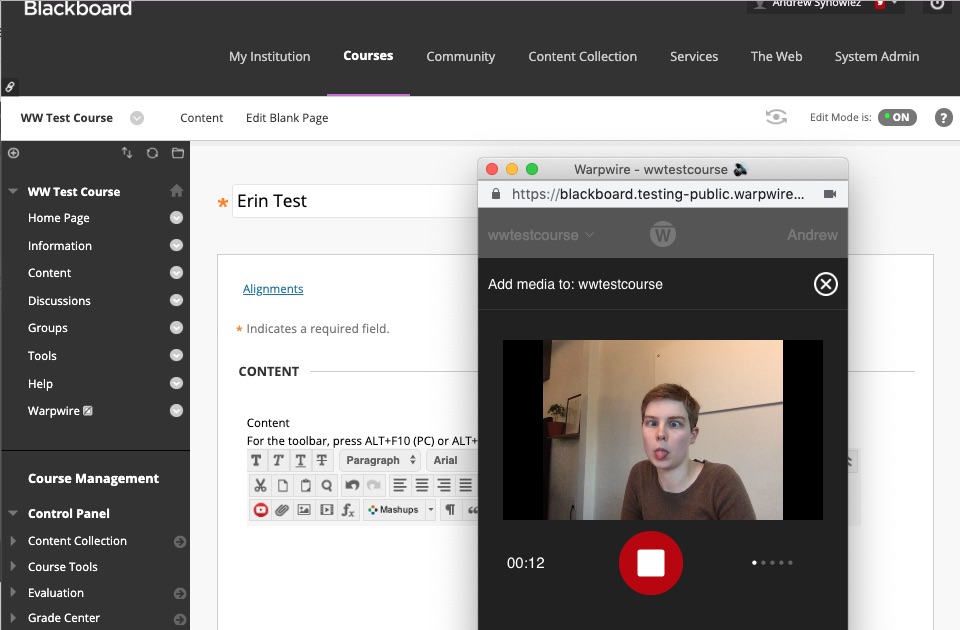
The button will turn red with a square in the middle, indicating video recording has begun. Record your video, then click the stop record button when you're finished.
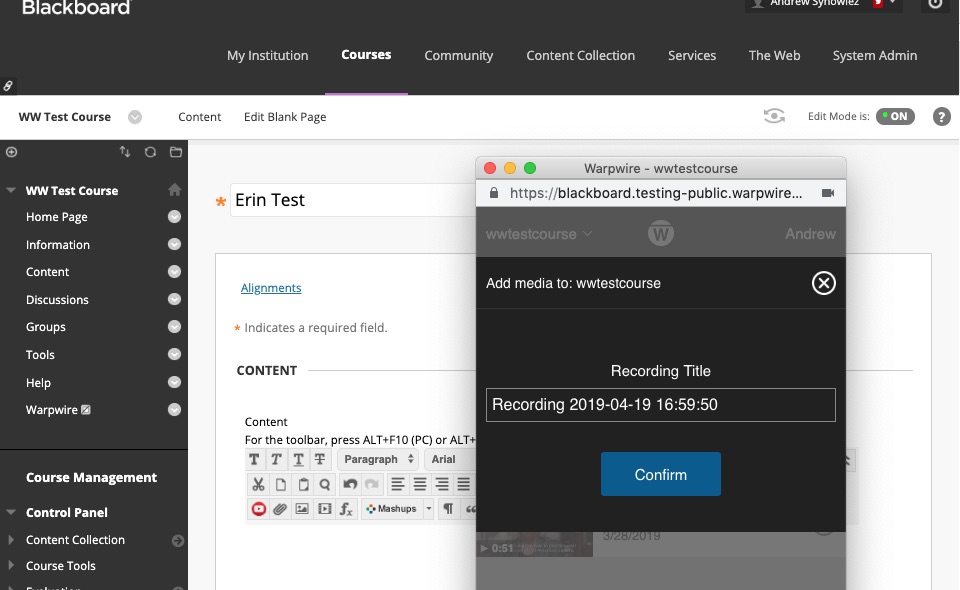
After recording, you'll have the opportunity to give the file a Title before uploading. Once you've named the recording, click "Save."
You'll be able to watch the upload progress bar as your capture uploads. Once uploaded and processed, it will appear in the list of media files in your course Media Library.
To insert your newly recorded file into a Blackboard text box, follow instructions above.
See also: Install the Warpwire LTI Tool in Blackboard.